How To Code Your Own WordPress ShortCode Plugin Tutorial (Part 1)
Welcome to the first installment in the How To Code Your Own WordPress ShortCode Plugin Tutorial series of articles. This series of articles aims to provide you with the knowledge required to develop a WordPress ShortCode plugin from start to finish. It is aimed at all levels of technical ability but ideally you should be familiar with WordPress and have some basic PHP knowledge.
A WordPress ShortCode Plugin can be used in any page or post within your blog and takes the form of [nameofplugin arg1="" arg2="" arg3=""]. When WordPress encounters text formatted in this style and recognises it as a registered plugin it will run the associated plugin and take the output of the plugin and replace the calling text. You will not see [nameofplugin arg1="" arg2="" arg3=""] in your post this text gets replaced with the text that your plugin returns.
Although this tutorial has been developed and tested using WordPress 2.8 you should find the techniques used applicable to all recent versions of WordPress. You may find in different versions of WordPress there are minor changes that are required to enable the code to work. If possible these have been noted in the code.
At the end of this series of tutorials you will have a working shortcode plugin that allows you to insert a list of posts matching your criteria into any of your posts. You can even see a version of the plugin in action in many areas of this site. Examples of this includes the listing of the Download and Support related posts within the Sound Control and TICK pages and an enhanced version is even used to display the Related Posts links that are sometimes listed at the end of posts.
Before Doing Anything
One of the main benefits of using WordPress are the many existing, freely downloadable plugins that are already available. To ensure your code does not interfere with these plugins or even the general coding of WordPress itself the first task is to choose a unique name of your plugin.
The name of your plugin should ideally have some unique prefix appropriate to you to ensure you do not duplicate the name of existing plugins. This prefix will also be used in all your plugin variable names to ensure uniqueness and that they do not interfere with other WordPress operations. This is generally unlikely to happen due to most of the code being encapsulated into functions but it makes for easier code reading, ensures compatibility and avoids difficult to track down problems later.
If you were writing a production environment plugin you could use your initials or some abbreviation of your company name for the prefix and then append that to a short description of the plugin. Instead of using spaces you should also use either hyphens or underscores. For the purpose of this tutorial we are going to name our plugin demo-list-posts. Where demo is the prefix and list posts is the descriptive name of the plugin.
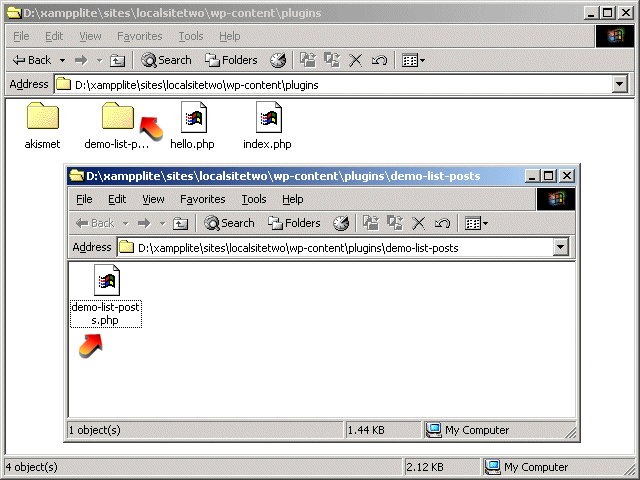
Each plugin in a WordPress system can be found in its own directory in wp-contents/plugins. You should create a directory in this location called demo-list-posts. Note how the name of the directory you have created matches the name you have given your plugin.
Getting Started
So the plugin can be integrated into the Wordpress interface the initial few lines of code in the plugin are used to describe its author and functionality. Then as we are writing a shortcode plugin we add the appropriate line to register the name of the plugin with the WordPress processing engine. This line also includes what function the processing engine should call if WordPress finds a call to your shortcode plugin in a post in your blog. For demonstration purposes and for the purpose of this first stage of the tutorial we will test the this initial code by ensuring whenever the shortcode is used in a post it will be replaced with the text Hello World!
Open your text editor, copy and paste the following code into a file and save as demo-list-posts.php in the plugin specific directory you created earlier. There are comments in the code but each line is documented in further detail below the code snippet.
<?php
/*
Plugin Name: DEMO List Posts
Plugin URI: http://www.reallyeffective.co.uk/knowledge-base
Description: DEMO List Posts
Version: 0.1 Beta
Author: Paul McKnight
Author URI: http://www.reallyeffective.co.uk
*/
/*
DEMO List Posts (WordPress Plugin)
Copyright (C) 2009 Paul McKnight
Contact me at http://www.reallyeffective.co.uk
This program is free software: you can redistribute it and/or modify
it under the terms of the GNU General Public License as published by
the Free Software Foundation, either version 3 of the License, or
(at your option) any later version.
This program is distributed in the hope that it will be useful,
but WITHOUT ANY WARRANTY; without even the implied warranty of
MERCHANTABILITY or FITNESS FOR A PARTICULAR PURPOSE. See the
GNU General Public License for more details.
You should have received a copy of the GNU General Public License
along with this program. If not, see <http://www.gnu.org/licenses/>.
*/
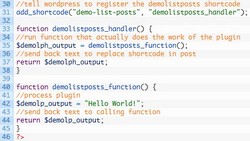
//tell wordpress to register the demolistposts shortcode
add_shortcode("demo-list-posts", "demolistposts_handler");
function demolistposts_handler() {
//run function that actually does the work of the plugin
$demolph_output = demolistposts_function();
//send back text to replace shortcode in post
return $demolph_output;
}
function demolistposts_function() {
//process plugin
$demolp_output = "Hello World!";
//send back text to calling function
return $demolp_output;
}
?>Lines 1/46: Tells the web server to process this code using PHP.
Lines 2-9: A comment block that WordPress uses to recognise a plugin and populate details of the plugin in the WordPress Dashboard.
Lines 11-28: License.
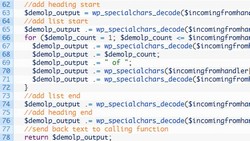
Line 31: An essential line that it used to register the plugin with WordPress. The first parameter is the name of the shortcode plugin and the second parameter is the function that WordPress uses to process this shortcode when it is found in an article.
Lines 33-38: It is good practice in all shortcode plugins to have a handler function that processes any parameters before they are sent to the actual function that actually does the work. This part of the tutorial is keeping things simple - part 2 will cover adding and processing parameters so for now the handler function just calls the function that does the work and then returns the text back to WordPress.
Lines 40-45: This is the function that does the work of the plugin. In this case it returns a textual string "Hello World!". Not a very useful plugin but it shows the mechanism of how WordPress plugins function.
See It In Action
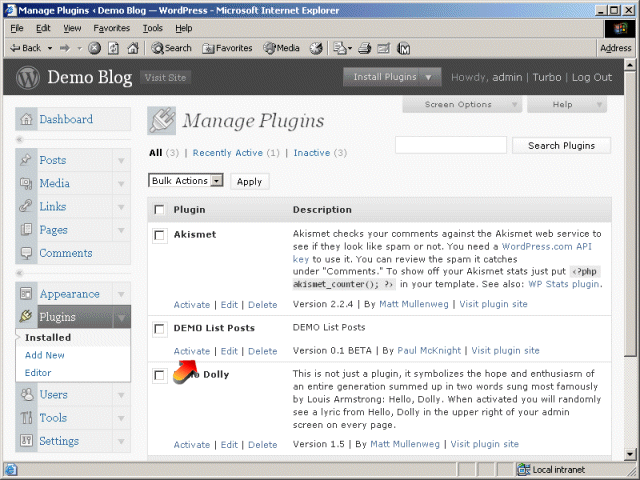
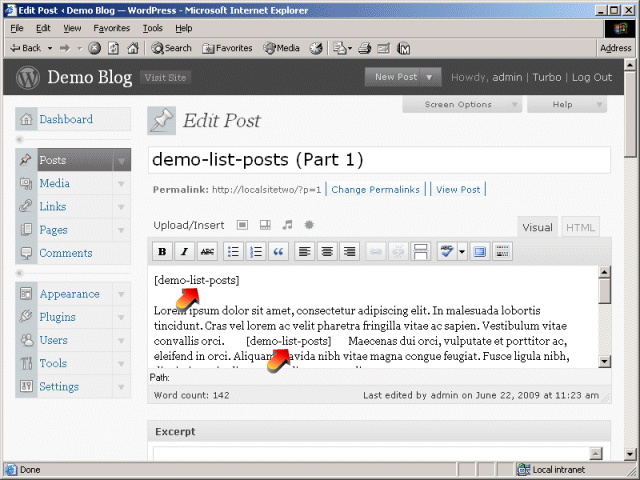
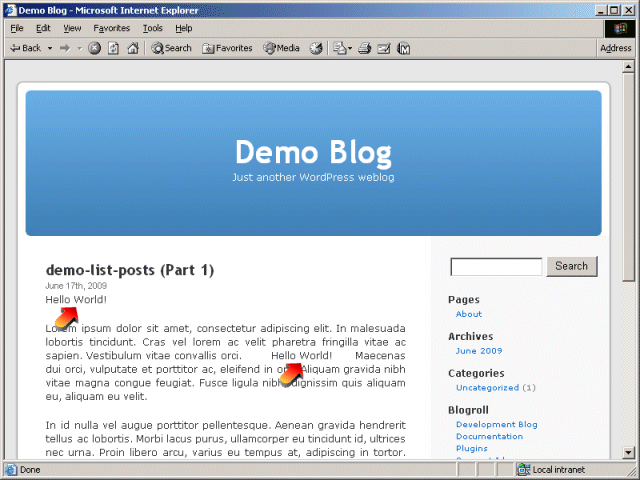
To view the plugin in action open the WordPress Dashboard and choose the Plugins menu item. Click Activate next to the DEMO List Posts entry (notice how WordPress has picked up all the details of the plugin from the comment block that was included at the start of code). Create or edit a page and add [demo-list-posts] anywhere in the text as many times as you like. If you publish/preview your page you will find the shortcode text will be replaced with the text Hello World! If the plugin does not activate or fails to output the Hello World! text ensure you have copied and pasted the text correctly and try again.
What Next
The plugins only real function at the moment is to show how to declare a WordPress shortcode plugin. However, the next part in this tutorial will describe how to update the code so different attributes can be specified at the post level and then be processed by the plugin which will make it much more useful.
Part 2 is now available so to continue reading the next part in this series of articles click the appropriate link in the Navigation or Related Posts section below.
If you have any questions or feedback please contact us via the usual methods.